Digital Catalogue Help
Digital Book is a powerful tool that can help you find the products you are looking for accurately and rapidly. Digital Book allows you to easily find products, write notes, highlight sections, assemble, combine and print different selections, save to PDF from multiple catalogues, open related videos, and find links to other resources.
Below is a guide on how to use the functions of the digital catalogue.
Index
1. My binder
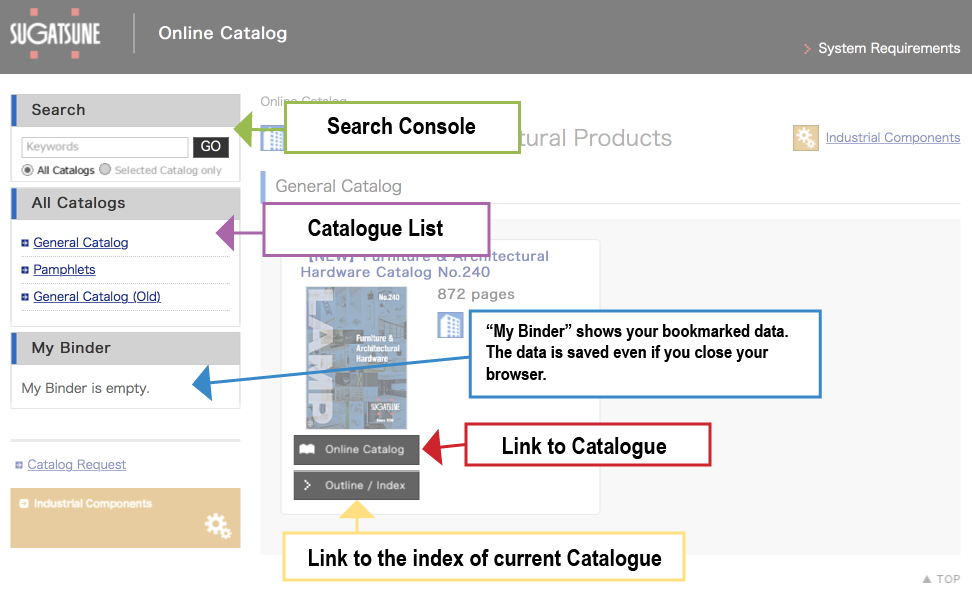
“My binder” is one of the most powerful tools of the digital catalogue, allowing you to customize, save and print different portions of the catalogue. Below is an explanation of the many ways you can add, change and customize different selections of “my binder”.
1.I. How to add to my binder
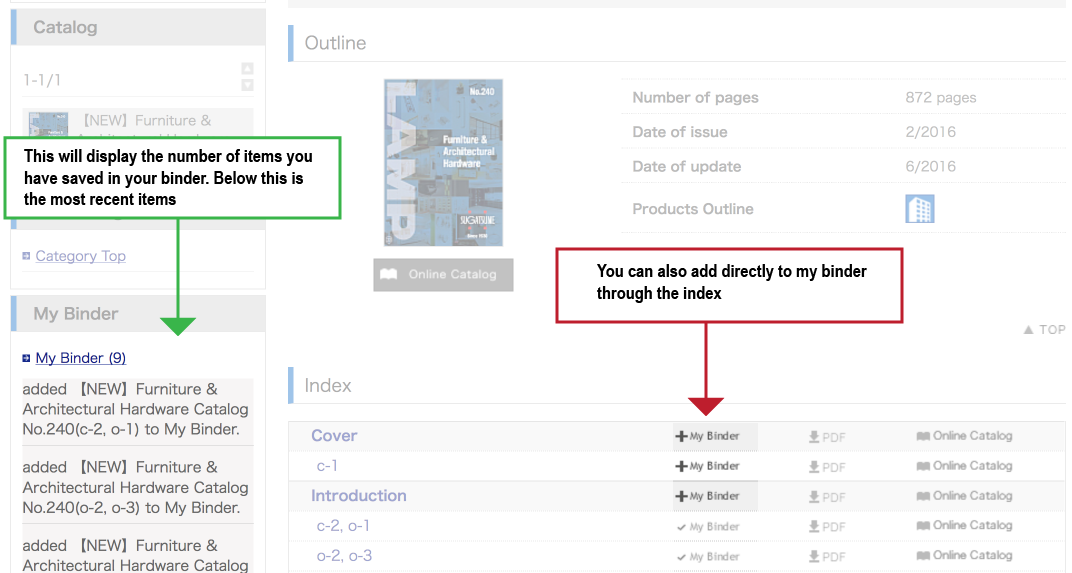
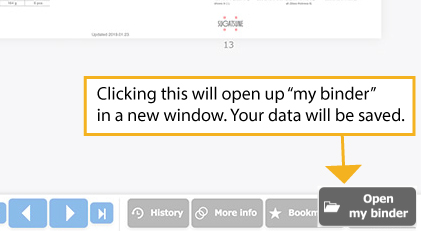
1.II. How to access my binder from the catalogue
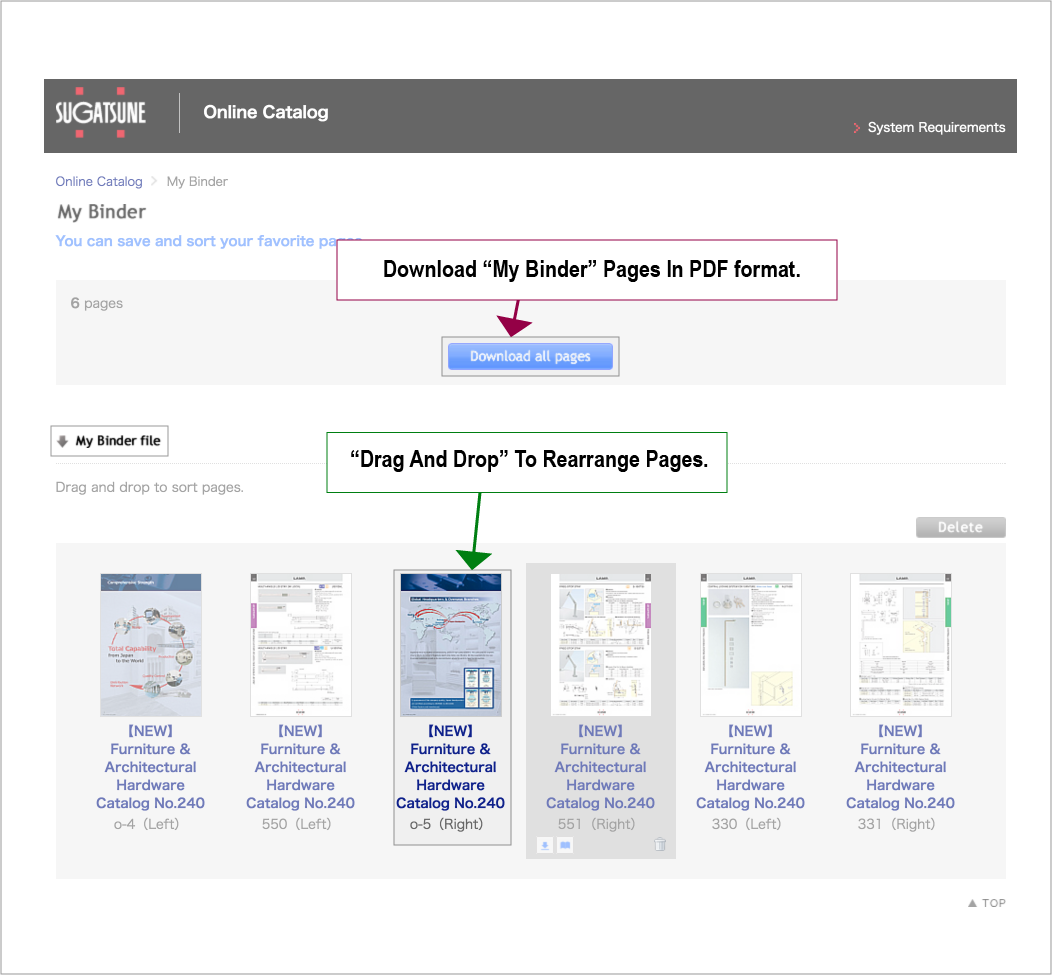
1.III. How to download from my binder
Notes
“My Binder” lets you organize pages you have bookmarked and written notes on. You can arrange them in whatever order you like and then save them as a PDF. All you have to do is drag and drop. When you are done, you can reset by clicking on delete. You can print off as many as 50 at a time. Your data will only be saved as long as your browser is open.
2. Features of the catalogue list
Notes
3. How to use our catalogue viewer
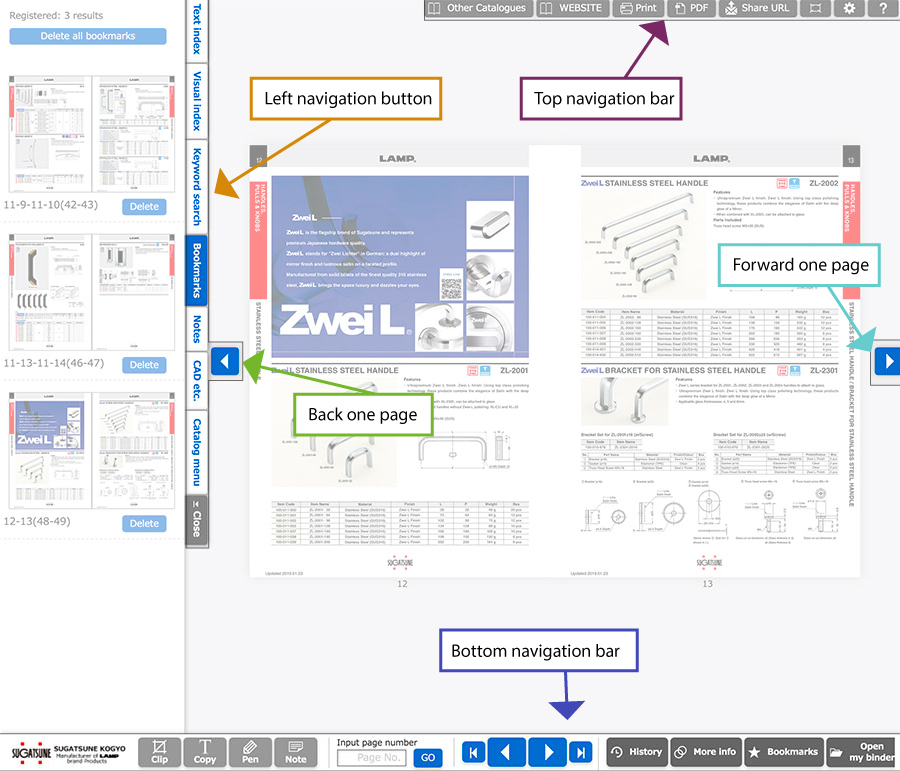
3.I. Main viewer screen
Hints
Clipping magnifies even more than double clicking magnification
The navigation menu on the left side expands when you click on any section.
3.II. Top & left navigation
Hints
Clipping magnifies even more than double clicking magnification
The navigation menu on the left side expands when you click on any section.
3.III. Bottom navigation
Hints
Bottom section has personal editing functions
Any notes you write or highlights you draw are saved in the left navigation. They will be saved even if you close and open your browser again
4. Left navigation further explanation
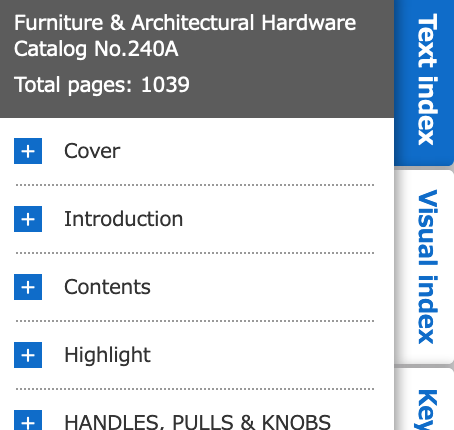
4.I. Text index
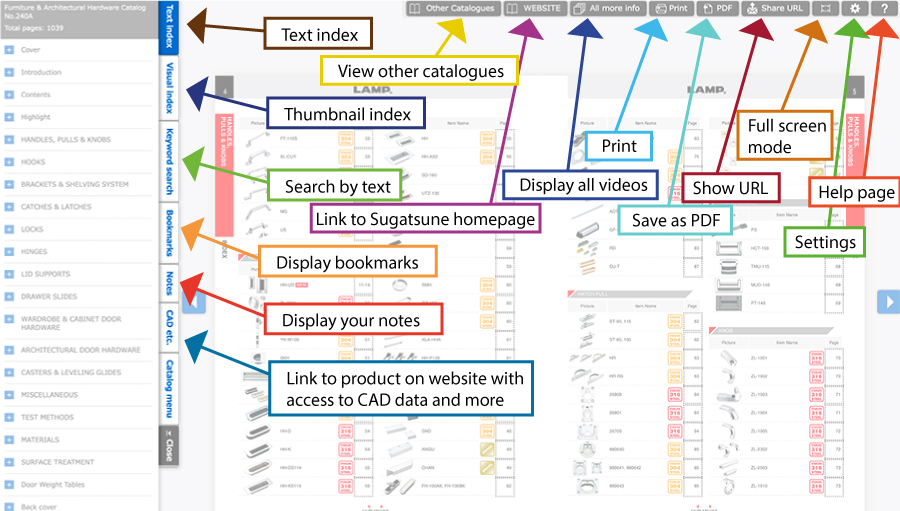
The top section, labelled “Text Index”, displays a list of all sections and subsections. By opening up sections, you can display specific page numbers. Clicking on those page numbers (in Text Index) will instantly take you to that page.
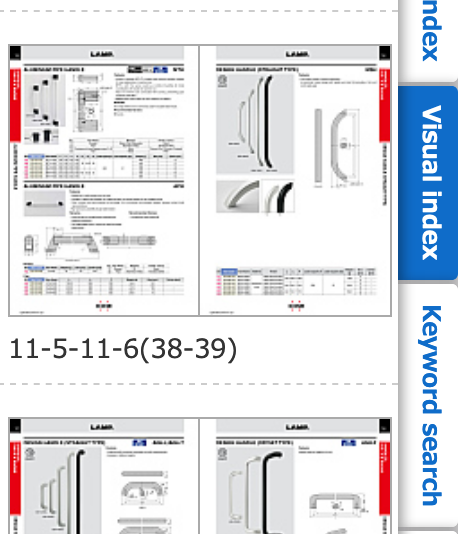
4.II. Visual Index
The second section from the top, labelled “Visual Index”, shows you the thumbnails (smaller pictures) of all pages. This can be a helpful and rapid way to look through product sections.
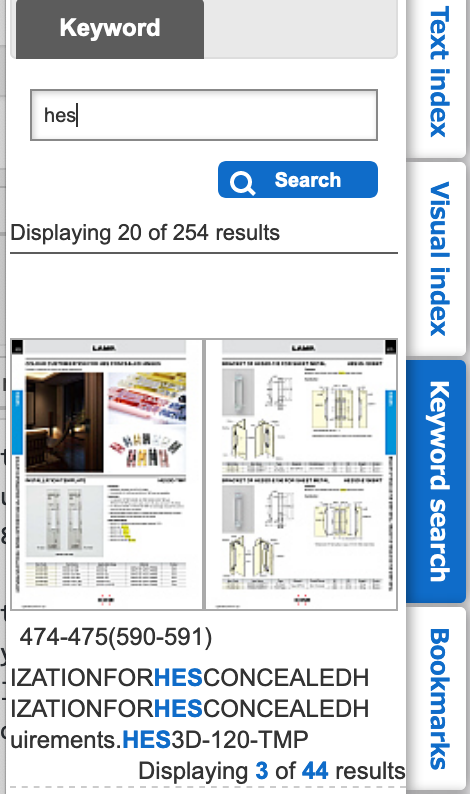
4.III. Search
The middle section, “Search”, can look through all pages quickly. It scans both the section headings and text to find relevant pages and displays them next to thumbnails (smaller pictures) of the pages.
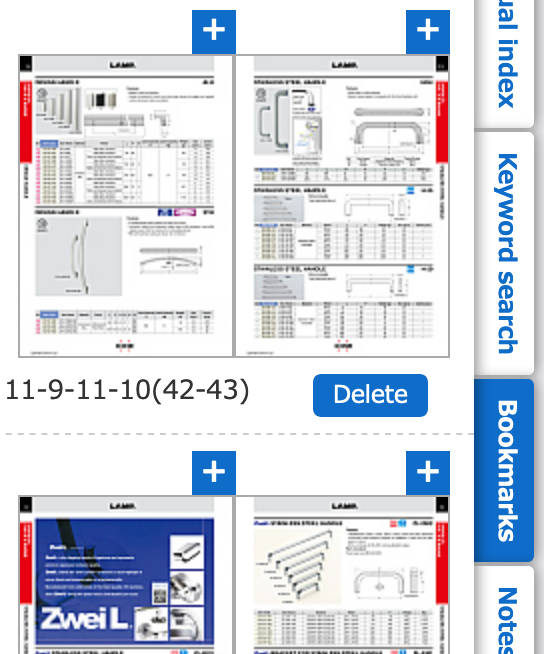
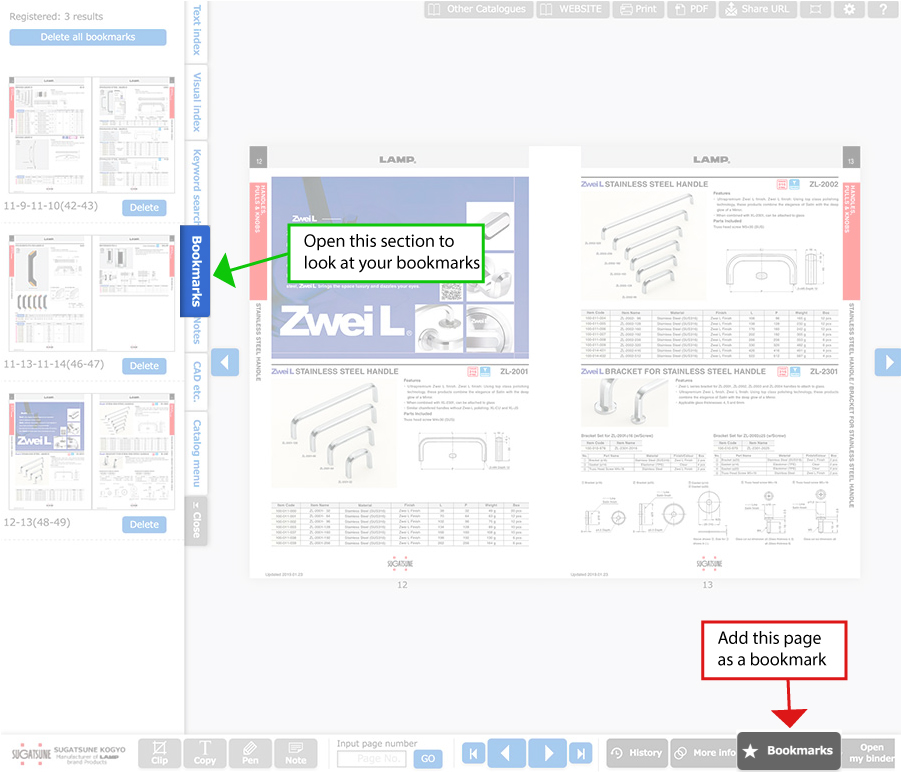
4.IV. Bookmarks
The fourth section, “Bookmarks” is a list of all your bookmarks. You can go directly to your bookmarks from here. The bookmark’s section displays thumbnails (smaller pictures) of your bookmarks. Your bookmarks will be saved for the next time you open up the digital book.
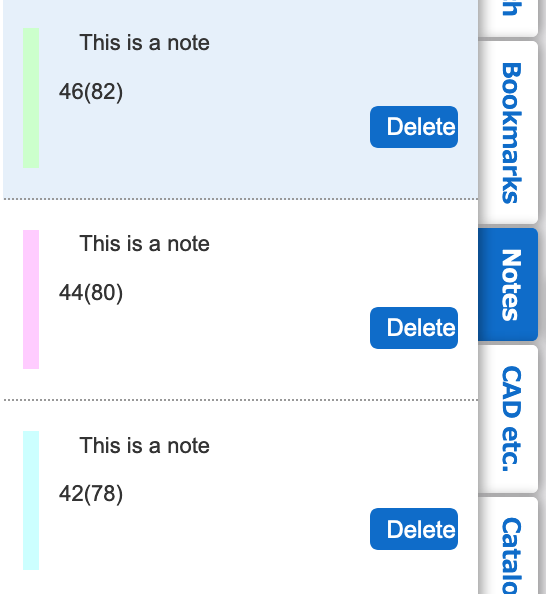
4.V. Notes
“Notes”, is a list of all your notes. Clicking on one of your notes will bring you directly to the page. When you save as a PDF or Print, you have the option to print and include your notes. Your notes and bookmarks will be saved even if you close the page.
5. Bottom navigation further explanation
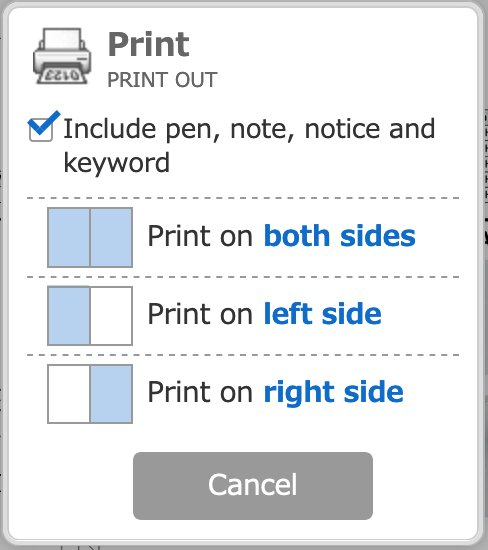
5.I. Print
Clicking on the Print button on the top will bring up this menu.
You have the option of including your pen marks and notes.
From here you can select to print one side of the current page you are looking at or both sides.
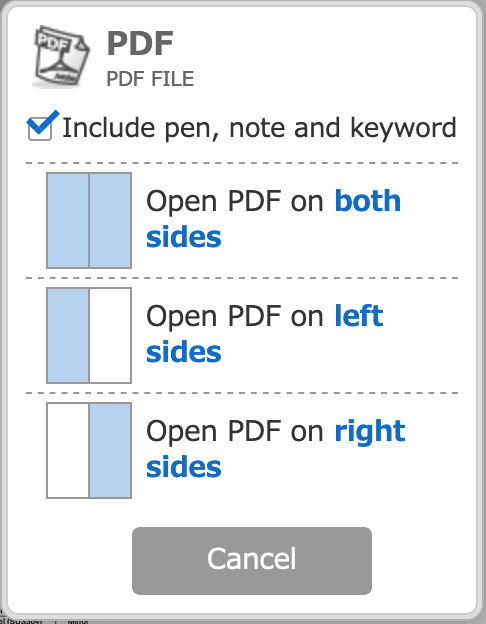
5.II. PDF
On the top row, “PDF”, will transform the pages you are currently reading into a PDF.
Clicking once on this option will open up a menu in the center of your screen.
You have the option of including your pen marks and notes.
From here you can select to make a PDF of one side of the current page you are looking at or both sides.
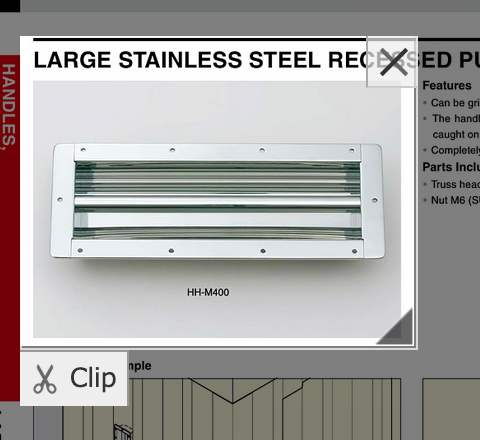
5.III. Clip
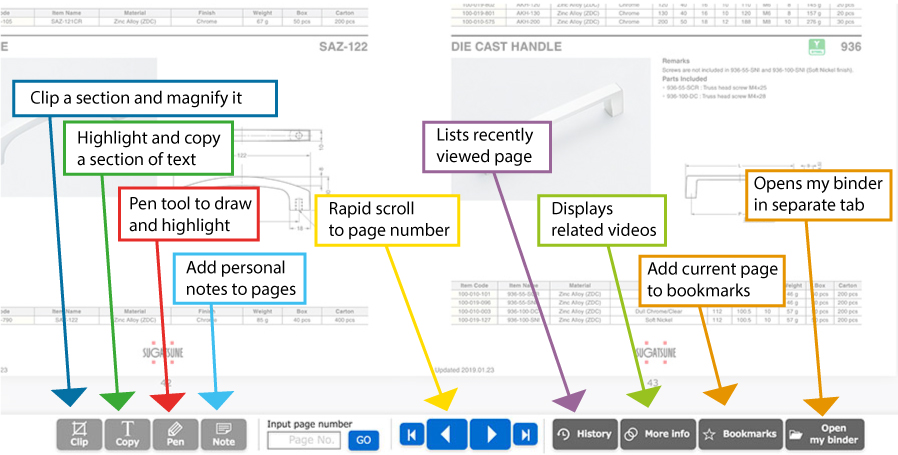
The first option on the left, “Clip”, allows you to highlight a selection, magnify it and turn it into an image.
Clicking on the Clip section, will open a small highlighted area over the central section of the catalogue page you are looking at. You can click on this section and drag it to adjust the position or click and drag on the triangle at the bottom of the window. This will allow you to adjust the size of the highlighted area.
Clicking on “Clip” on the bottom of the highlighted area will bring up the highlighted area in another tab or window.
You can save this image on your personal computer.
To close the highlight function, you can click the X symbol in the top right of the highlighted section.
5.IV. Copy
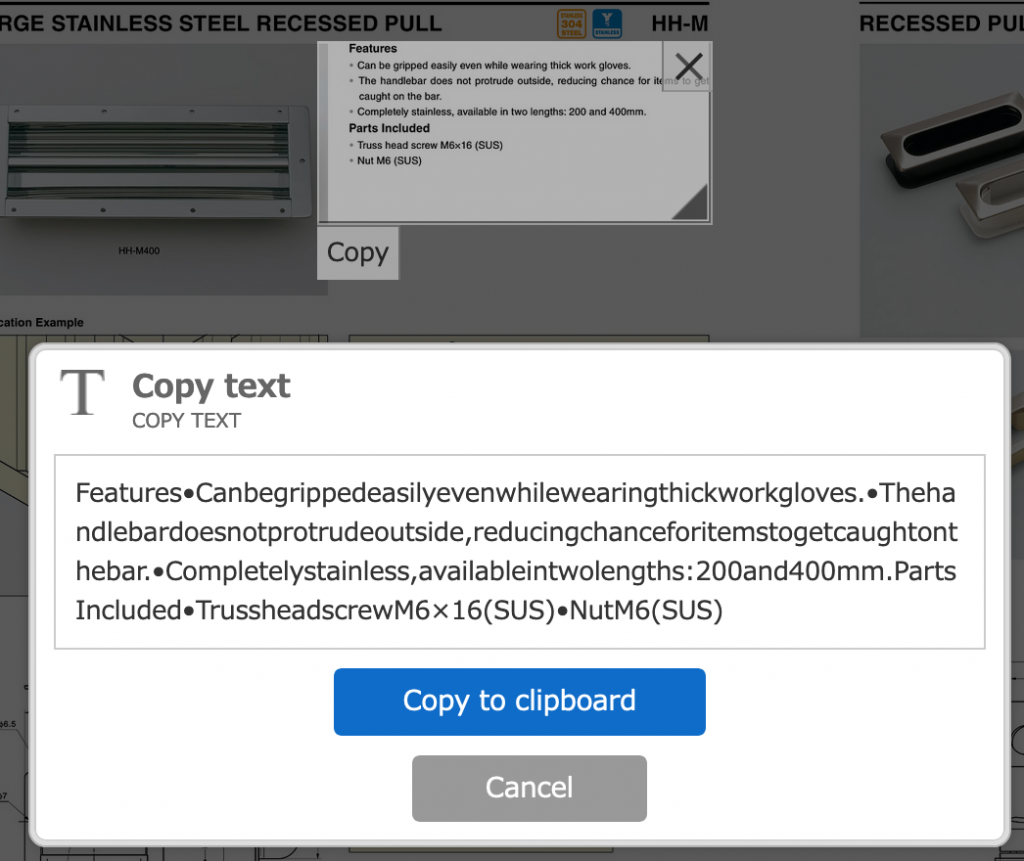
“Copy”, allows you to highlight a selection and display only the text.
Clicking on the Clip section, will open a small highlighted window in the middle of your browser window. You can change the position of the highlighted section by clicking and dragging the highlighted area. You can also adjust the size by clicking on the darker triangle on the bottom right section of the highlighted window. Adjust the positioning of this to cover the text you want to cover. Afterwards, click “Copy” on the bottom left.
This will display the text a separate window.
To copy the text to your clipboard, click the “Copy to clipboard” button in the window that pops up.
To select different text, click “Cancel”.
To close the Copy windows, click on the “Copy” button in the bottom panel. The same button that you used to open this function.
*Note, not all text can be copied and some text may not display properly.
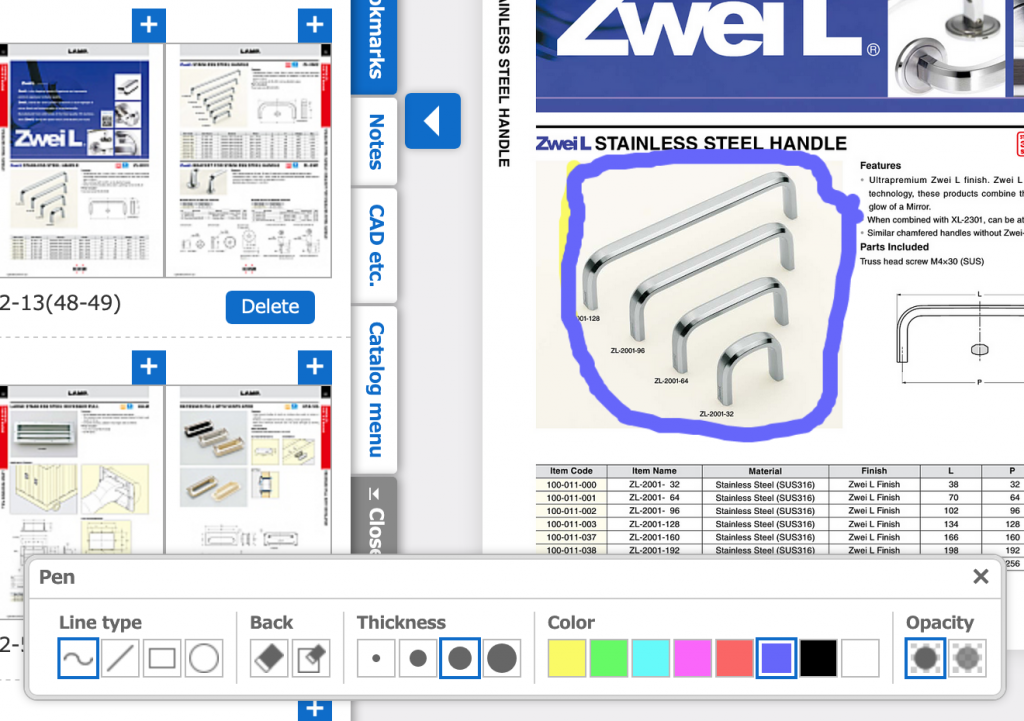
5.V. Pen
“Pen”, allows you to draw and highlight certain sections of text.
Clicking on this button will open up a small window.
You can choose the colors, size and shapes that you would like to use.
Click on the right eraser icon under “Back” inside the pen menu.
You will be prompted to make sure you want to delete all your pen marks.
These marks can be included in your PDF or printed documents if you select the options at the top of those functions.
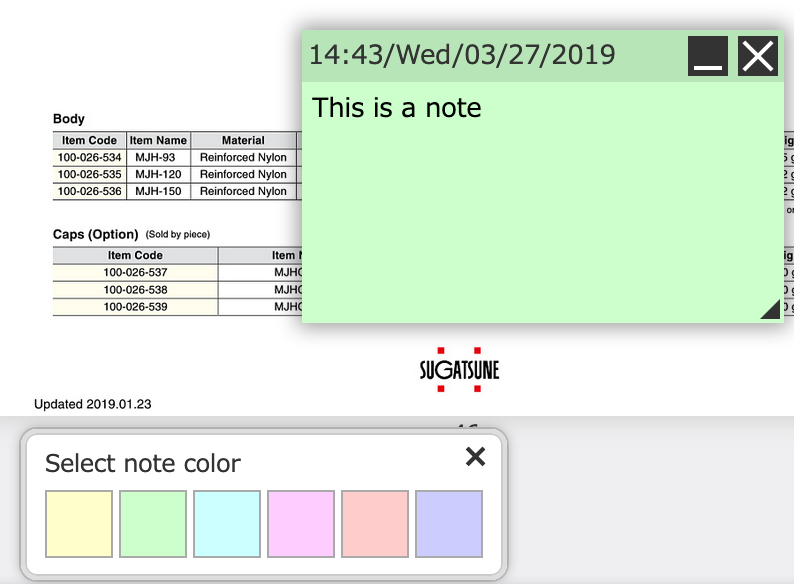
5.VI. Note
“Note”, allows you to draw and highlight certain sections of text.
To write inside your note, click anywhere inside the colored area of the note.
You can adjust the placement of the note by clicking on the top bar. It is a slightly darker color. It is on the same line as the trash can, in the top right hand side.
You can adjust the size of your note by clicking on the icon in the bottom right corner of the colored note. By clicking and holding, you can drag and make the screen smaller or bigger.
You have the option of picking which color you use to write your notes.
You can keep track of your notes with the panel on the left side of the screen.
You can instantly jump to any note that you have already written.
You have the option to include your notes when you print or create a PDF.
To delete your note, click on the X button on the top right.
Or you can click on Notes on the left panel, find your Note and click “Delete”.
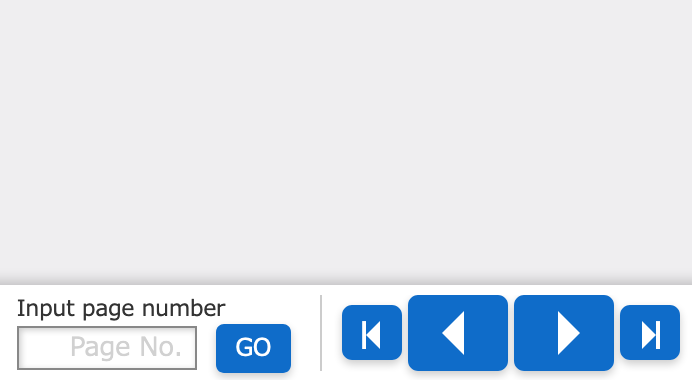
The middle section allows you to rapidly scroll to a page.
Under “Go to page”, if you type in the page number and hit “Go”, it will take you directly to that page.
The icon with two directions and a straight line will scroll to the first or last page.
The direction icons will move you to the previous or next page. Depending on direction.
The bar above this displays the current page and total number of pages. This bar will allow you to rapidly scroll through the catalogue.
To rapidly scroll through the catalogue, you can click and drag on the square icon in the middle of this bar.

5.VIII. History
“History” displays your recently viewed history.
Clicking here will open up the display.
To go back to a page that you looked at recently, click on the Hist. icon and click on one of the page numbers displayed.
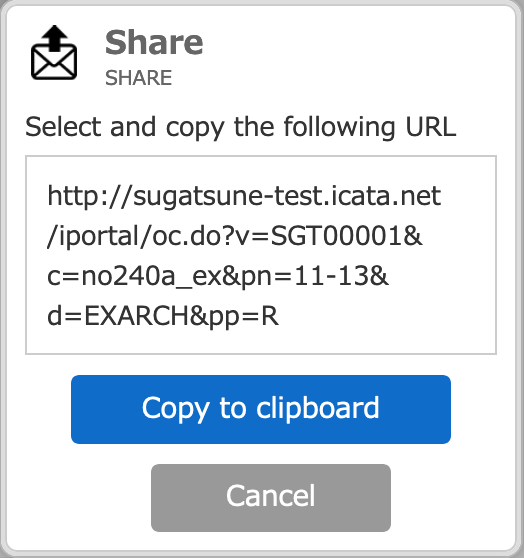
5.IX. Share URL
“Share URL” displays the web address of the page you are currently looking at.
You can save this or send it to someone else.
This web address will take you back to the current page to the page you were viewing.
You can highlight it and copy it.
6. System requirements
Required systems for looking at the digital catalogue in your browser.
| Operating Environment | Software | Resolution | Color Resolution |
|---|---|---|---|
| Microsoft Windows XP / VISTA / 7 or more recent | Internet Explorer 6+, Firefox – most recent, Adobe Reader – most recent | 1024 * 768 | 16 bit |
| Mac OS 10.6、10.7、10.8++ | Safari 5.1/6.0, Firefox – most recent, Adobe Reader – most recent | 1024 * 768 | 16 bit |
Required devices for using the iCata application (smartphones or tablets)
| Operating System | Required Device |
|---|---|
| iOS4.3 or later | iPhone4, iPhone4S, iPhone5, iPad (4th generation), iPad (3rd generation), iPad2, iPad (first generation), iPad mini |
| Android | Android 2.2, Android 2.3, Android 3.2, Android 4.0, Android 4.1, Android 4.2 |
| Kindle | Kindle Fire HD, Kindle Fire |
| Windows | Windows 8, RT |